Publisher Barcode Maker Application designs library-specific barcode labels (EAN, UPC, ISBN, Codabar, etc) that are very beneficial for all library stores, publishing industries, and booksellers. Software creates barcodes for library racks, books, magazines, library cards, periodicals, and many other library-related things. Program provides the facility to export the created publisher barcode labels in both the image and the pdf file format.
Library Barcode Designing Software is a lightweight, and easy-to-use tool that enables the user to create bulk copies of library barcode labels with different text and values by using the advanced batch processing feature. Application makes it easy for the user to lock any text, values, or images that they don't want to modify during the barcode label designing process. Software is easily compatible with both barcode printers as well as general printers.
Follow the below steps to create barcode labels using Barcode Software for Publishers and Library
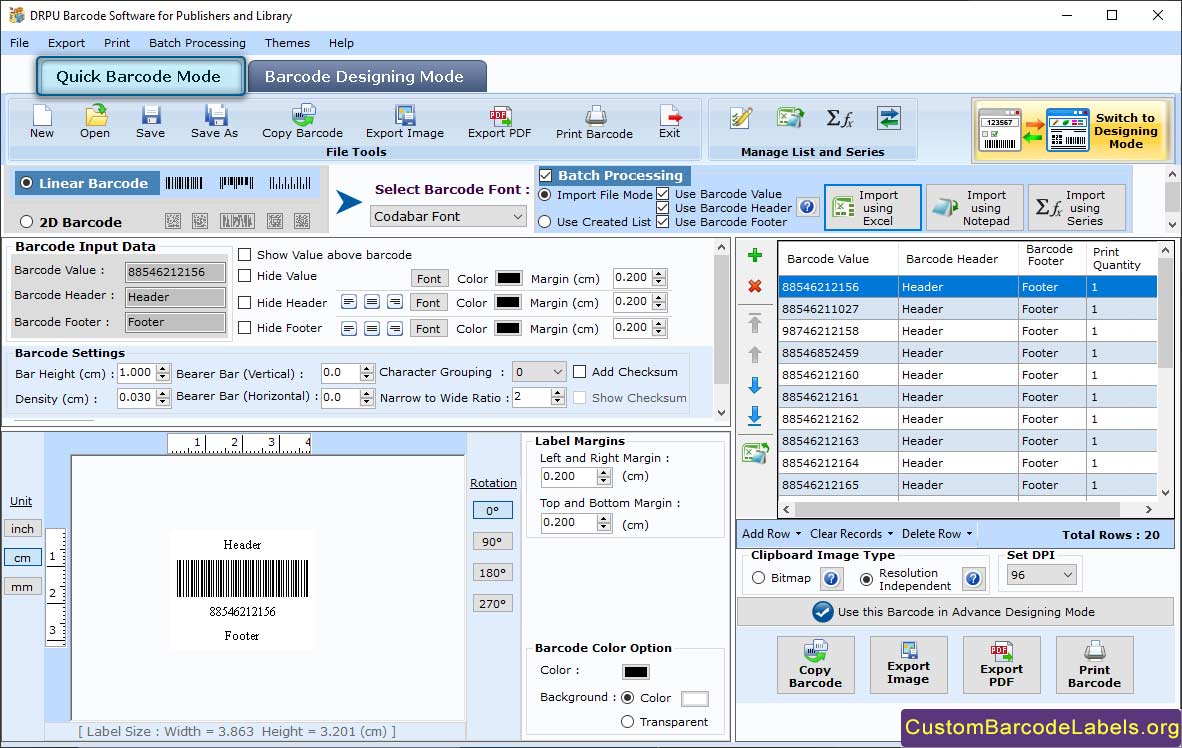
Step 1: Generate the Library Barcode Font in Quick Barcode Mode
- Create a library barcode using EAN 13 linear barcode font in the quick barcode mode mode as shown in the below screenshot.
- Modify the several barcode properties such as barcode value, barcode footer, barcode header, density, bar height, align footer, align header, etc.
- Go to the barcode settings tab, and modify narrow to wide ratio, value margin, header margin, footer margin, bearer bar (vertical and horizontal), etc.
- Modify the font (font family, style, or size) of barcode footer, barcode value, and barcode header.
- Go to the image settings tab, and modify the clipboard image type (bitmap or resolution independent metafile), image DPI, and orientation.

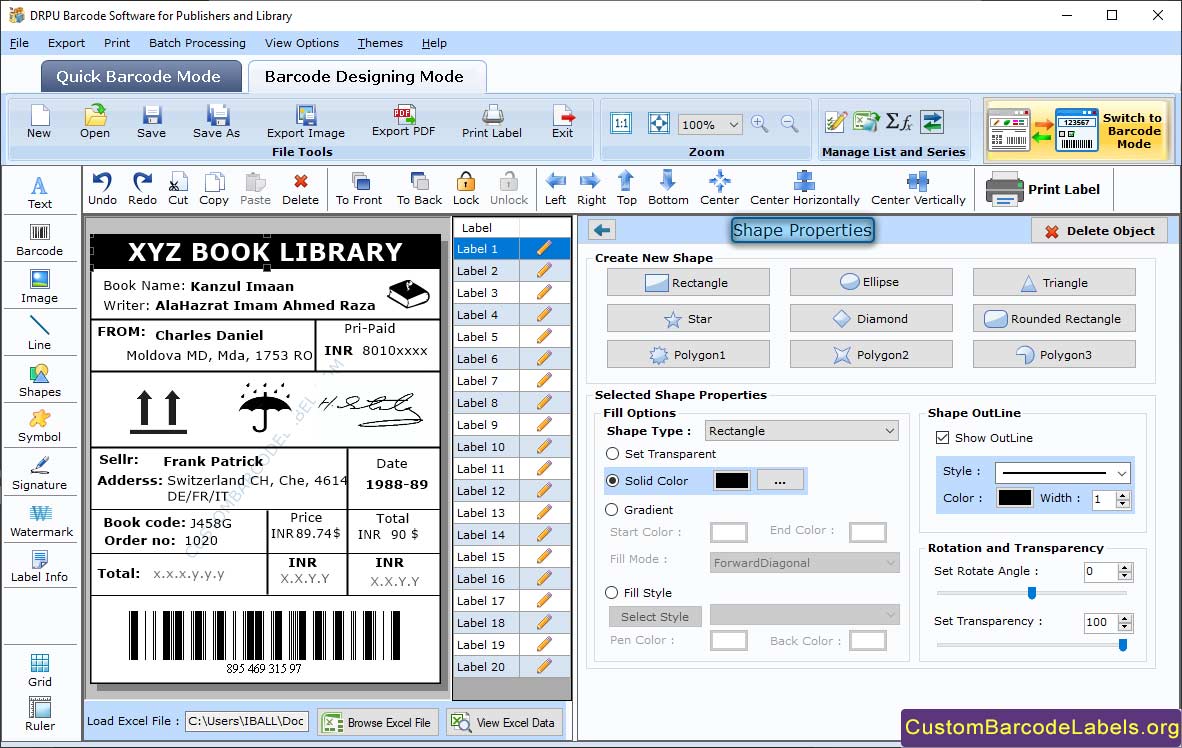
Step 2: Design the Library Barcode Label in Barcode Designing Mode and Change the Shape Properties
- Personalize your library barcode label with the help of a large variety of tools including barcode, text, custom shapes, signature, watermark, etc.
- To change the shape properties, click on the shape that you have inserted in your library barcode label, and you will notice different settings.
- Give a solid brush (color), gradient (start color and end color), or style (fill style, pen color, and background color) to the inserted shape in the color settings.
- Add an outline (with a different style, color, and width) around the shape in other settings. You can also change the rotation angle and transparency of the shape.

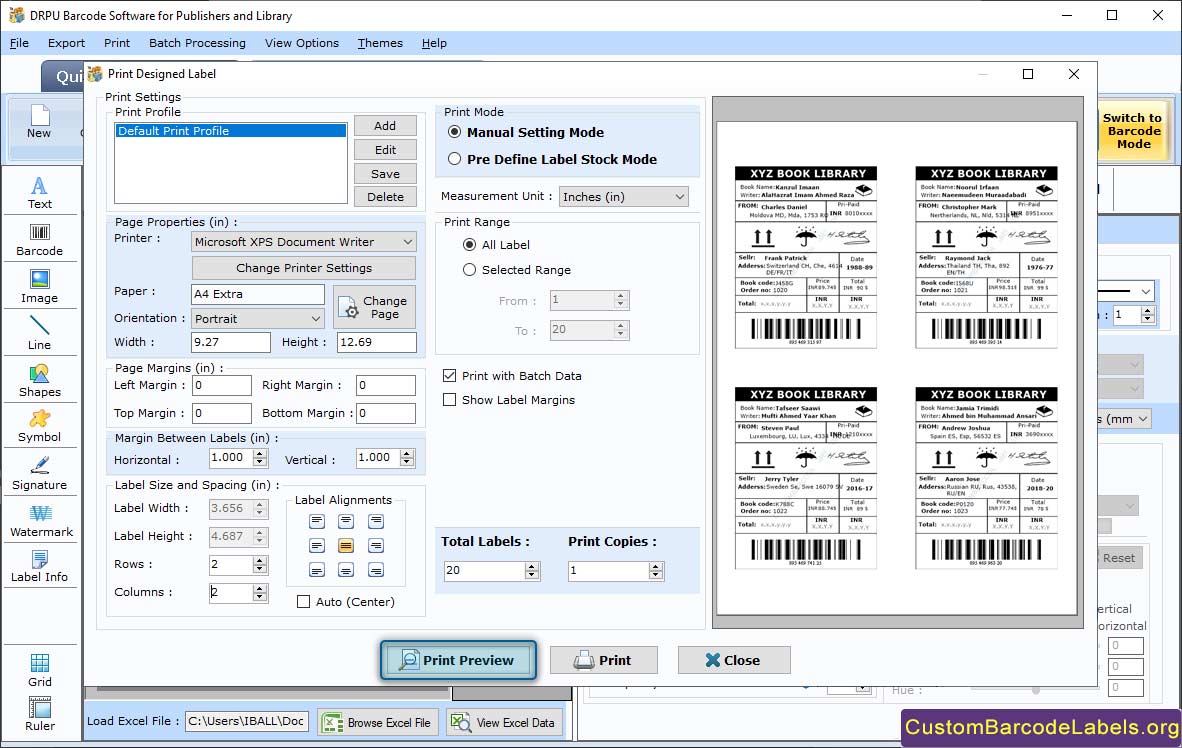
Step 3: Print the Created Library Barcode Label
- Start the printing process of your library barcode label by clicking on the print icon from the standard tools option.
- Click on the Manual print mode to print the barcode label in your own way. (You can also choose Pre Define Label Stock print mode to simplify your printing process).
- Modify the several page properties like paper used, page dimensions, printer type (here we select Microsoft XPS Document Writer), and orientation.
- Modify the margin between labels (vertical and horizontal) as well as page margins (top, right, bottom, and left).
- Enter the values of copies number, total labels, and maximum labels per page.
- Print your designed barcode label by clicking on the print button. You can also resolve all the design mistakes before printing by selecting the print preview option.
